How to Style an Afro Bohemian Living Room
Styling a living room and building a living room are not the same thing.
Styling is arranging objects in positions that look considered. Building is making decisions in a sequence where each one creates the context for the next — so that by the time the room is complete, every element is responding to something rather than existing independently.
The Afro Bohemian living room is built, not styled. The sequence is the system. Get the sequence right and the soulful maximalism holds together. Skip a step or reverse the order and the room reads as accumulated decoration rather than deliberate layering.
This guide covers the full build sequence from first furniture decision to final sensory layer.
Quick Takeaway:
- The velvet sofa is the first decision — its color sets the palette register that every textile, rug, and wall piece responds to.
- The wall gallery is built in four layers — Juju hat first, basket cluster second, carved mask third, photography fourth — each layer at a distinct scale and material register.
- The modern industrial contrast frame — matte black bookshelf, curtain rod, and floor lamp — is added last because its role is to frame what’s already assembled, not to lead the composition.
Step 1: Set the Lighting Temperature Before Anything Enters the Room
The first step in building an Afro Bohemian living room is replacing every bulb in the space with 2700K warm LED before a single piece of furniture enters.
This isn’t aesthetic preference — it’s structural logic.
Every material decision made under cool-white light is made under false conditions. The rust velvet sofa that reads as deep and warm in the showroom under warm display lighting will read as brownish-orange under a 4000K ceiling downlight. The jute rug’s warm honey fiber tone will shift toward grey-green. The ochre wall will lose its depth.
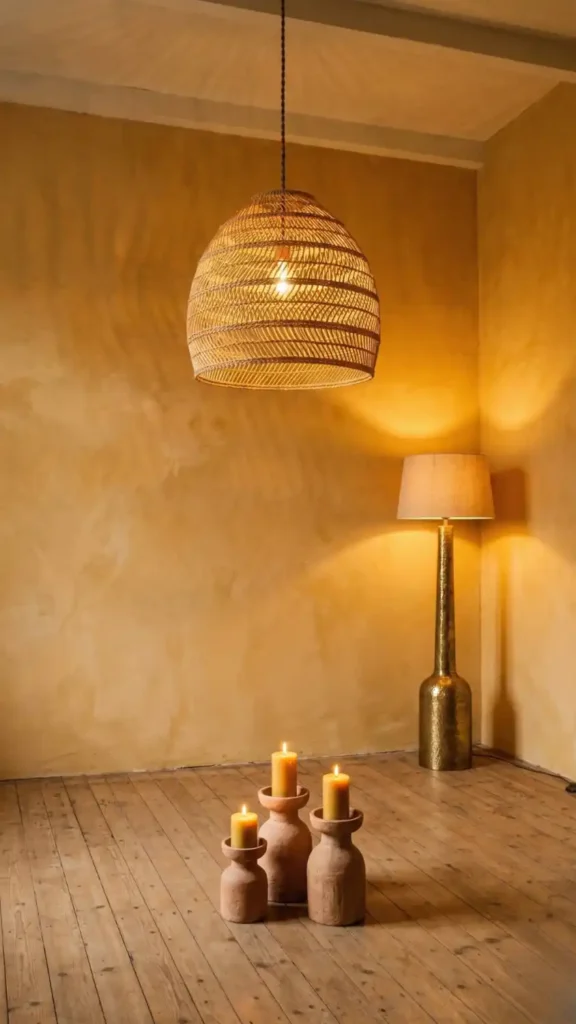
Install the rattan pendant at the correct height — 180–190cm from floor to pendant base — before evaluating the room’s proportions for furniture placement. Install the hammered brass floor lamp in the corner where it will eventually live beside the sofa.
Place the terracotta candle holders where the coffee table will sit.
Evaluate the room’s light zones under these three sources and confirm that every surface the light touches reads correctly before any furniture decision is made.
Step 2: Position the Velvet Sofa and Confirm Its Color
The velvet sofa is the first furniture decision and the room’s primary color commitment — made before the rug, before the cushions, and before any wall piece.
Position it in the room under your 2700K lighting and evaluate the color under warm light conditions before accepting it as correct.
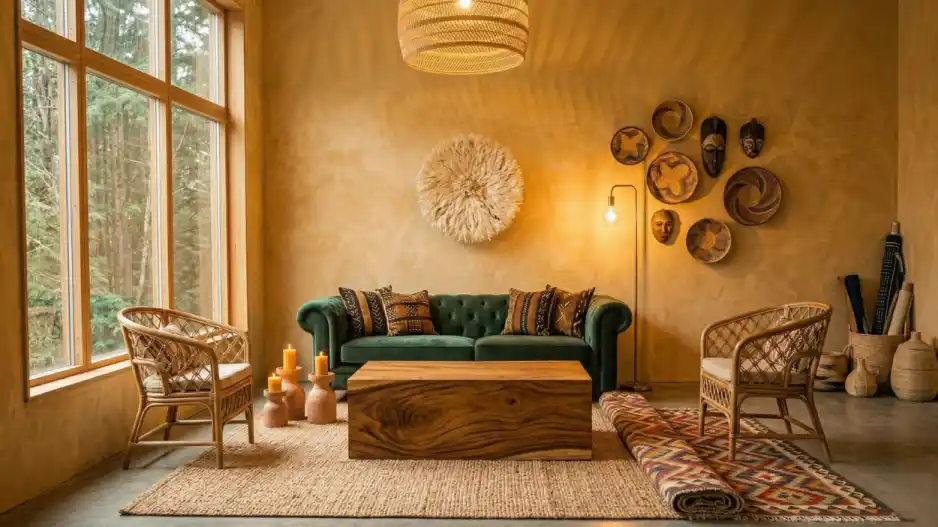
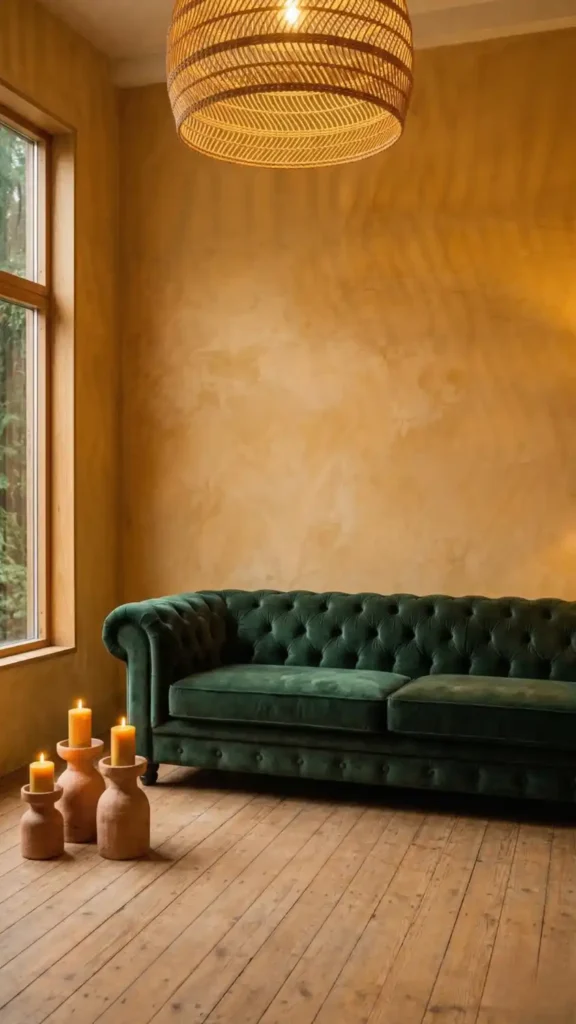
Forest green velvet under 2700K reads as deep botanical — warm enough to sit within the earth palette’s Life tone category while maintaining enough contrast against ochre walls and jute rugs to function as the room’s visual anchor.
Rust velvet under 2700K reads as deep terracotta-adjacent — sitting at the intersection of Earth tone and Heritage Accent, warm and immediately cohesive with the broader palette.
If the velvet reads correctly under your warm light — rich, deep, and clearly within the palette — the sofa stays.
If it reads as cool or desaturated under 2700K the color is wrong regardless of how it looked in the store. Address this before building the textile and rug layers on top of an incorrect foundation color.
Step 3: Lay the Jute Base Rug
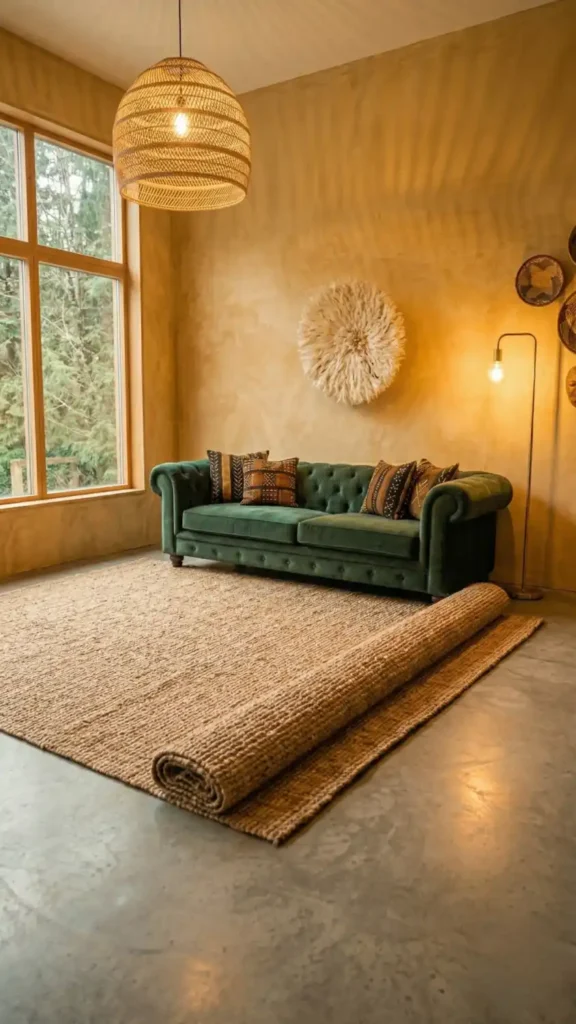
The jute or sisal base rug is the floor layer’s foundation — and it must extend under the front legs of the sofa and all chairs before anything is placed on top of it.
A rug that stops at the furniture perimeter creates visual disconnection between the floor layer and the furniture layer. A rug that extends beneath the front legs creates a unified ground plane that the furniture sits within rather than on top of.
Roll the jute base out first and walk the room’s perimeter to confirm the rug reaches the correct positions.
Then evaluate the jute color under your 2700K lamp.
Natural honey-toned jute reads as warm and grounding under warm light — it confirms the Earth tone foundation of the palette at the floor level. If the jute reads as cool or grey under your lighting it’s the wrong fiber tone and will create palette tension beneath every layer placed on top.
Step 4: Layer the Kilim or Beni Ourain on Top
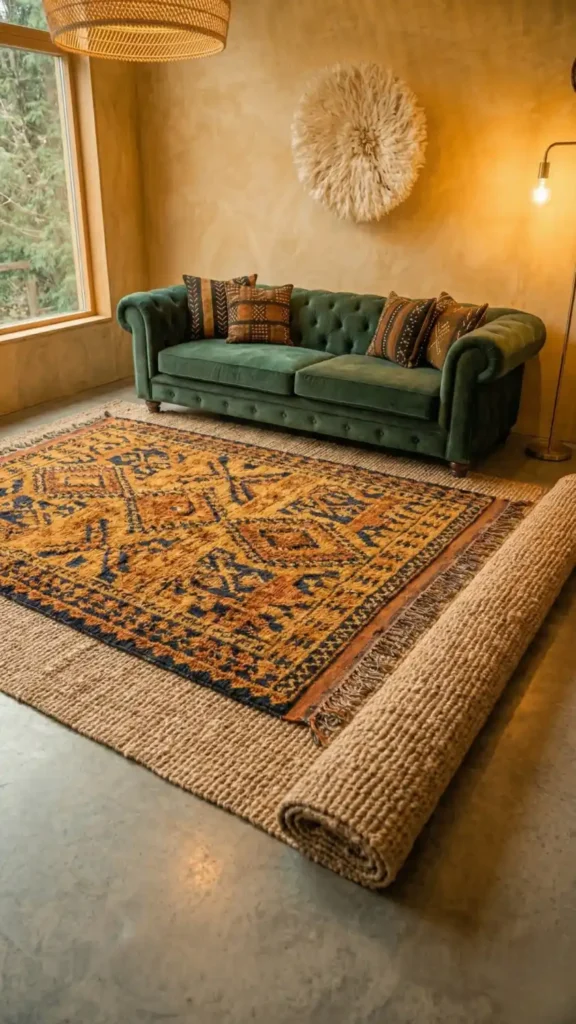
The kilim or Beni Ourain accent rug is placed after the jute base is confirmed — because the accent rug’s color palette needs to respond to the jute’s neutral honey tone rather than be chosen in isolation.
Center the kilim within the jute’s visible surface area — sized so approximately one third of the jute base remains visible around the kilim’s perimeter.
The kilim’s geometric pattern in ochre, burnt orange, and deep indigo introduces all three palette categories simultaneously at the floor level: Earth tones in the ochre, Heritage Accent in the burnt orange, Life tone in the indigo.
Once both rugs are in place step back and evaluate the floor layer as a complete composition.
The jute and kilim together should read as deliberate depth — two distinct material characters in clear conversation. If the kilim is too large it overwhelms the jute base. If it’s too small it reads as a mat rather than a design layer. Adjust position and evaluate before placing any furniture on top.
Step 5: Place the Coffee Table and Flanking Chairs
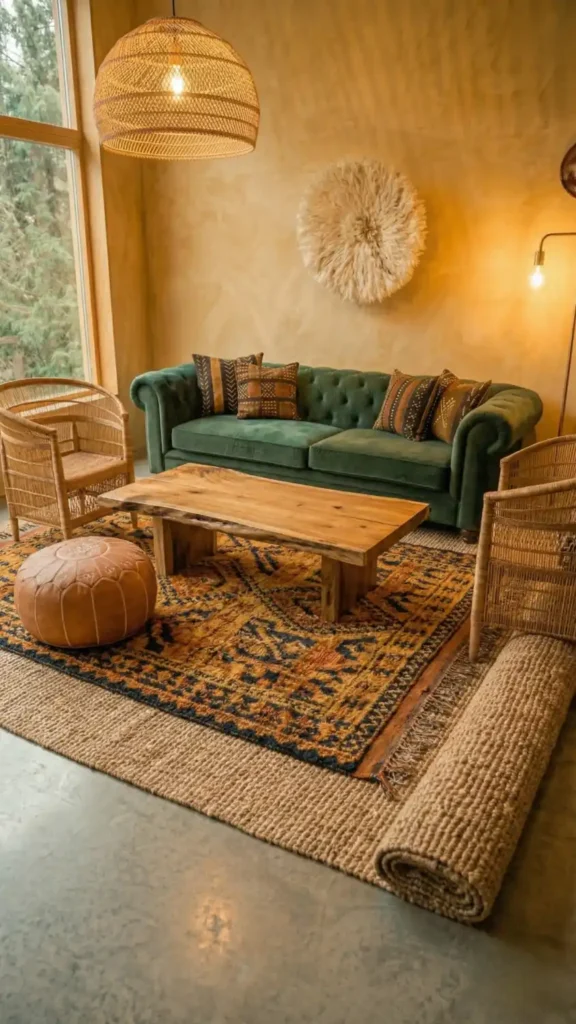
The furniture placement step positions three pieces simultaneously — the coffee table, the flanking chairs, and the leather pouf — because their spatial relationship to each other determines whether the seating arrangement reads as a composed zone or a furniture grouping.
Center the live-edge reclaimed teak or mango wood coffee table on the kilim rug. The live edge should face the sofa — the irregular natural boundary of the wood slab is the table’s most distinctive surface and should be visible from the primary seating position.
Position the Malawi cane chairs or rattan peacock chairs on either side of the table — not directly facing the sofa but at a slight angle inward. The angled position creates a more conversational arrangement and prevents the bilateral symmetry that pushes the room toward formal interior design territory.
Place the leather Moroccan or Nigerian pouf beside one cane chair on the kilim surface. Beside one chair only — not mirrored on both sides. Asymmetry at this level maintains the collected-over-time quality the aesthetic depends on.
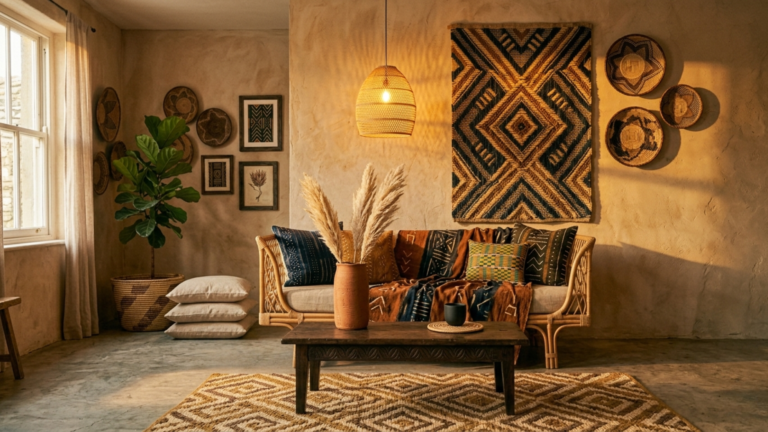
Step 6: Build the Sofa Textile Layer
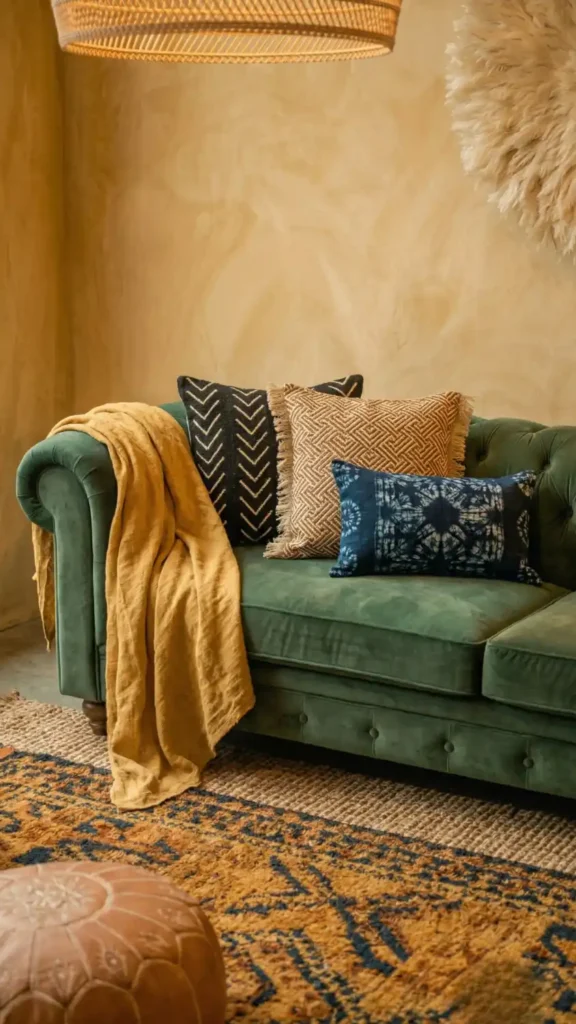
The sofa textile layer is built in sequence — one piece at a time — with each addition evaluated before the next is placed.
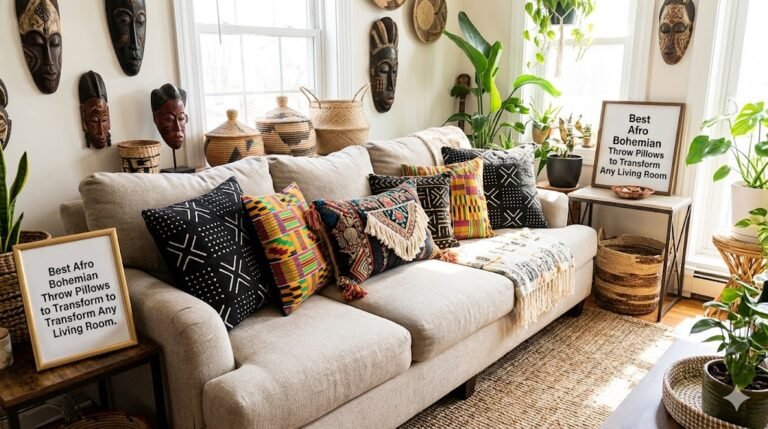
Start with the mud cloth cushions at the sofa’s back corners. The black and cream geometric pattern establishes the High Contrast palette component at the most visible position. Step back. Does the mud cloth sit correctly against the velvet? The contrast between the rough cotton weave and the plush pile should make both materials more legible.
Add the Kuba cloth cushion at center. The dense raffia-inspired pattern at a different geometric scale than the mud cloth adds maximalist pattern density without competing at the same visual scale. Step back again.
Add the Yoruba Adire indigo batik floor cushion at the sofa base or as an oversized accent on the kilim in front. The hand-dyed indigo introduces the cooling Life tone that balances the sofa’s warm velvet dominant at the ground level.
Drape a mustard linen or Adire indigo throw over one sofa arm — not both. One draped arm reads as lived-in casual. Both draped arms reads as styled symmetry. The difference is significant.
Step 7: Style the Coffee Table Vignette
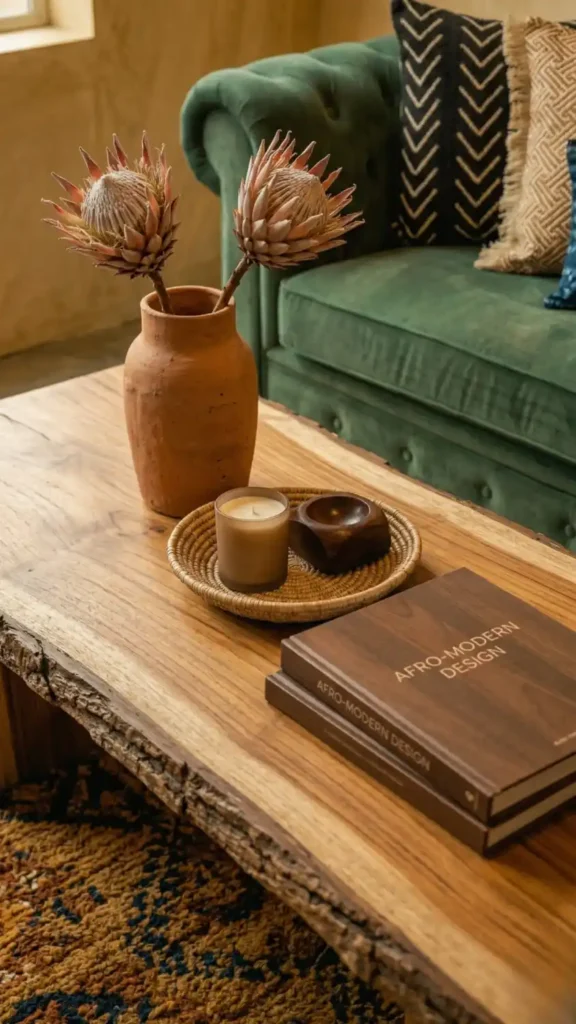
The coffee table surface is the living room’s most social horizontal surface — and it’s styled as a vignette rather than as a display. Three elements in an odd-number arrangement with deliberate negative space on either side.
One tall object: a terracotta vessel with dried protea or pampas stems — height variation at the back of the grouping.
One mid object: a coiled grass tray holding a sandalwood candle and one small dark wood object — the tray frames the two smaller elements as a composed sub-grouping within the larger vignette.
One low object: a stack of two large art books — photography books on African design, textile traditions, or landscape — flat at the front of the grouping.
The empty table surface on either side of the grouping is as important as the objects themselves. It’s the visual breathing room that makes the vignette readable as curated rather than placed.
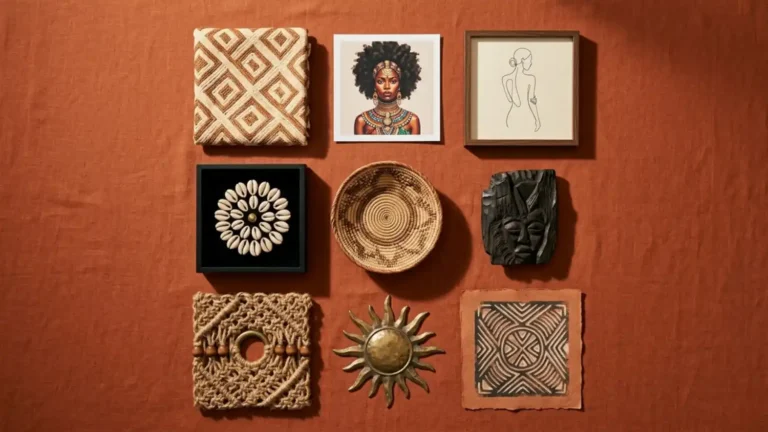
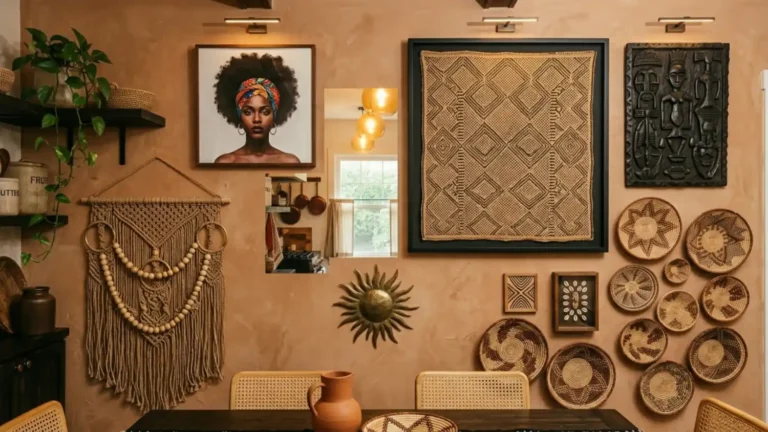
Step 8: Build the Wall Gallery in Four Layers
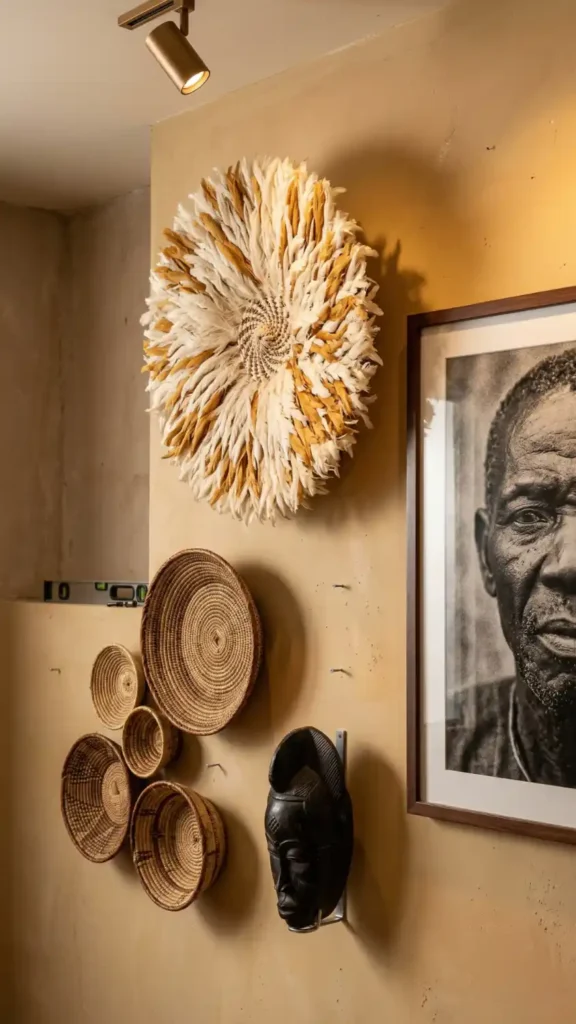
The wall gallery is built in four layers — in a specific sequence where each layer is evaluated before the next is added.
Layer one: the Juju hat. Mount it centered on the focal wall at approximately 160–170cm from floor to hat center. This is the gallery’s primary circular focal point — the piece that sets the center axis everything else organizes around. Confirm its position is correct before adding anything beside it.
Layer two: the basket gallery. Arrange five to seven Tonga, Binga, or Zulu telephone wire baskets asymmetrically to one side of the Juju hat — not centered, not mirrored. Vary heights and sizes within the cluster. The basket gallery’s geometric patterns extend the wall composition into the pattern vocabulary at a smaller and more varied scale than the Juju hat.
Layer three: the carved mask. Mount a Bamileke or Fang carved mask on a museum-style bracket below the basket cluster — at eye level where its surface detail can be read at close range. The three-dimensional sculptural depth of the carved mask adds a material register that flat textiles and photographs don’t provide.
Layer four: large-scale film photography. A grainy portrait silhouette or African landscape composition in a dark wood frame to the opposite side of the Juju hat from the basket cluster. The photography adds contemporary visual language in direct conversation with the traditional craft objects — and its smooth glass-fronted frame provides the one flat reflective surface in an otherwise entirely textural wall composition.
Step back after each layer and evaluate the wall as a whole before adding the next. The gallery should read as progressively richer — not progressively busier.
Step 9: Install the Modern Industrial Contrast Frame
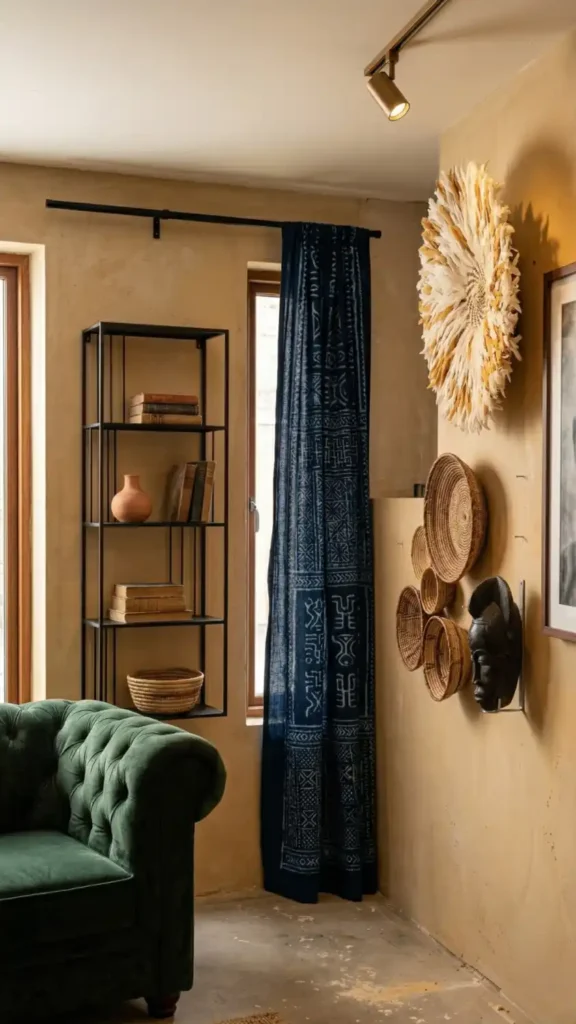
The modern industrial contrast frame is installed after the heritage and handmade layers are fully assembled — because its role is to frame what’s already there, not to lead the composition.
Position the slim matte black metal bookshelf against the wall adjacent to the basket gallery — not in front of the focal wall but beside it, in the supporting wall zone. Style its shelves with three material types: stacked art books (smooth), a terracotta vessel (rough), and a coiled grass basket (open-weave). The same three-surface-type rule that governs every other vignette in the room applies here.
Install the matte black curtain rod at the window and hang the Adire indigo linen panels.
The indigo linen panels do two things simultaneously: they introduce the Yoruba Adire textile tradition at the window’s vertical position, and the deep indigo color adds the Life tone cooling accent at a scale that floor cushions alone can’t provide.
The two matte black elements — bookshelf and curtain rod — create a visual thread of contemporary minimalism through the room. Subtle. Present. The frame that makes the heritage aesthetic readable as curated rather than accumulated.
Step 10: Place the Greenery at Three Spatial Zones
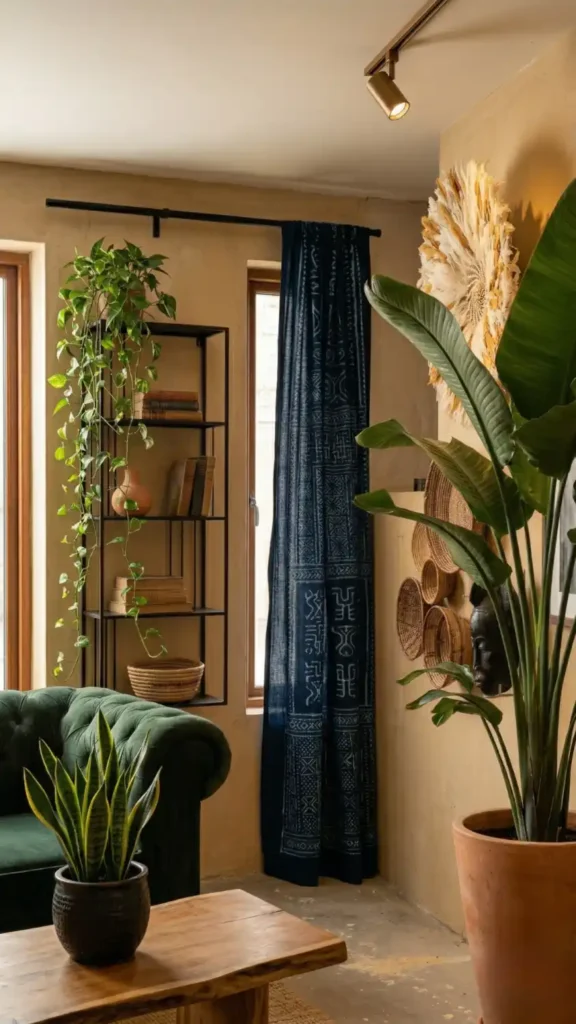
Greenery enters the room last — after the furniture, textile, wall, and industrial contrast layers are all in place — because each plant’s position is determined by the spatial gaps the assembled room reveals.
Three zones. Three plants. Three distinct spatial contributions.
The large corner zone: a Bird of Paradise or Fiddle Leaf Fig in the room’s most open corner with access to indirect natural light. The Bird of Paradise’s broad tropical leaf silhouette fills the floor-to-ceiling zone with botanical drama — a foreground presence the eye reads alongside the sofa and wall gallery rather than behind them.
The high shelf zone: a trailing Pothos or Heartleaf Philodendron at the top of the matte black bookshelf. The cascading vines soften the upper wall corner behind the shelf — filling the dead zone where wall meets ceiling with organic movement that reduces the architectural hard line.
The close-range zone: a Snake Plant or ZZ Plant on the coffee table end or console. Structural. Upright. Low-maintenance. Present at the most social surface in the room without overwhelming the coffee table vignette beside it.
All three in terracotta pots — or dark ceramic where terracotta would repeat too closely with the vessel on the coffee table. The container material participates in the palette. Plastic nursery pots visible in a fully assembled room are the single most common material break — repot before the plant enters the space.
Step 11: Complete the Sensory Layer
The sensory layer is the last thing added — and the first thing experienced when someone enters the room.
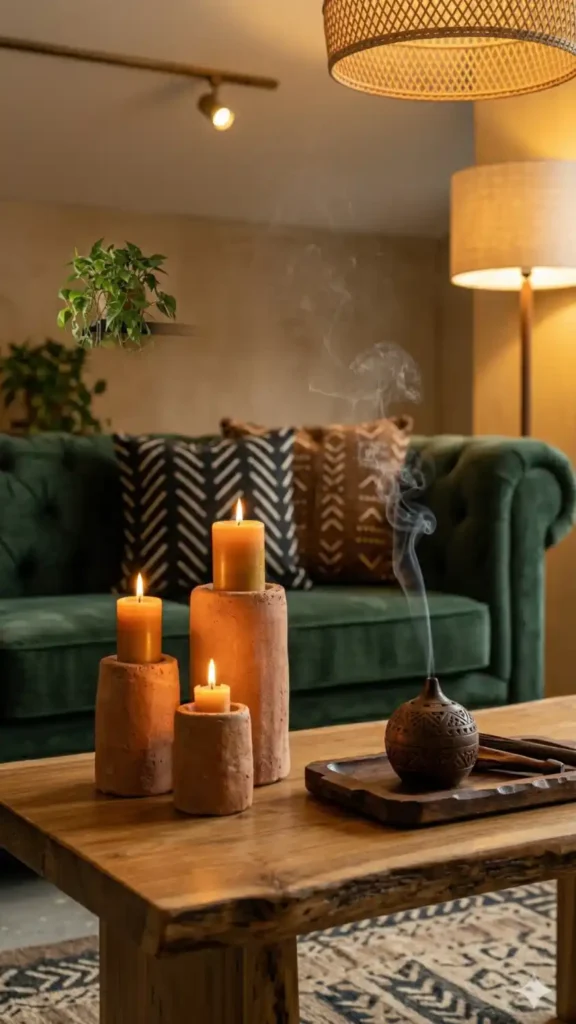
Scent engages the space before the eye has resolved the visual composition. Sandalwood incense in a terracotta burner on the coffee table or console introduces the olfactory layer that makes the room immersive rather than merely visual.
Three terracotta pillar candle holders at varying heights on the coffee table surface provide the warm flicker that no electric source replicates.
The candles also serve as the table-level light source that completes the three-height lighting architecture — pendant overhead, hammered brass floor lamp at mid-height, candle flicker at surface level.
Light the candles. Sit on the sofa. Look at the room.
The wall gallery should be the first thing the eye lands on from the sofa position — the Juju hat the primary focal point, the basket cluster and photography at secondary attention, the carved mask readable at closer range. The rug stack grounds the floor plane. The velvet sofa carries its color correctly under warm light. The greenery fills the corner and the upper shelf zone with organic life.
If any layer reads as incomplete from the sofa position that’s the layer to address before adding anything further.
Final Room Audit: Reading the Space Before Calling It Done
Walk through the completed living room and answer these questions:
- Stand at the room entry point. Where does the eye land first? It should move to the Juju hat or the velvet sofa within the first two seconds. If it lands on the matte black bookshelf or the curtain rod first the industrial contrast frame has become too dominant — reduce one of the two matte black elements.
- Sit on the sofa and look at the wall gallery. Can you read all four layers — Juju hat, basket cluster, carved mask, photography — as distinct elements at distinct scales? If two are competing at the same scale reduce the smaller one or increase the physical distance between them.
- Is the jute base rug extending under the front legs of all seating? Walk around the furniture perimeter and check physically — not visually. Rugs often appear to extend further than they actually do.
- Count the patterned textiles in the sofa cushion arrangement. Can you identify three distinct textile traditions — mud cloth, Kuba cloth, Adire — at three distinct geometric scales? If two are competing at the same scale replace one with a solid earth-tone cushion in linen or velvet.
- Look at the coffee table vignette. Is there deliberate negative space on both sides of the object grouping? If the entire table surface is activated clear one end entirely and evaluate whether the vignette reads more powerfully against the cleared surface.
- Light all three candles and turn off the overhead lights for thirty seconds. Evaluate the room under candle light only. The surfaces that glow most warmly in candlelight — the teak grain, the terracotta vessels, the velvet pile — are the room’s most materially successful decisions. The surfaces that disappear or look flat in candlelight are the ones that need material reconsideration.
The Afro Bohemian living room is built in eleven steps — not eleven independent decisions.
Each step creates the context for the one that follows. The sofa color determines the textile palette. The jute base determines the kilim choice. The kilim color informs the cushion Adire accent. The Juju hat sets the wall gallery’s center axis. The basket cluster responds to it. The carved mask responds to both. The photography completes the gallery at a fourth scale. The industrial frame keeps the gallery from closing in on itself. The greenery fills the zones the objects can’t reach. The sensory layer makes the room inhabitable rather than viewable.
That’s the system. And when the system operates correctly the room doesn’t read as decorated. It reads as built — from the inside out — by someone who understood what every element was for before they placed it.
Continue building your Afro Bohemian living room:
- Afro Bohemian Living Room: The Complete Style Guide — Get the full palette logic and design framework behind soulful maximalism
- 11 Afro Bohemian Living Room Ideas for a Warm and Layered Space — Pull from 11 specific ideas broken down by furniture, textile, and wall position
- Afro Bohemian Living Room Decor Must-Haves for Beginners —Start with the beginner-friendly buying sequence before working through the full styling process