How to Create an Afro Bohemian Interior Design Style at Home
Most people approach room decorating as a shopping problem.
They build a mood board, make a list, and buy everything more or less simultaneously. That process works for some aesthetics. It consistently fails for Afro Bohemian design — because the style is built on accumulated layers, material contrast, and handmade objects that need to be chosen individually rather than batch-purchased from a single source.
The correct process is sequential. Each decision creates the context for the next one. Start in the wrong place and every subsequent choice is made without a reference point — which is exactly how rooms end up feeling assembled rather than layered.
This guide covers the full sequence from first decision to finished room — including what to do, what order to do it in, and what to avoid at each stage.
Quick Takeaway:
- The anchor textile comes first — every color, material, and furniture decision in the room is made in response to it, not independently of it.
- Lighting temperature gets resolved before any styling decisions — 2700K warm throughout, or the palette will mislead you at every subsequent step.
- The room is built in layers over time, not assembled in a single purchase — the pieces found gradually create the specificity that makes the aesthetic feel genuine.
Step 1: Change the Lighting Before You Do Anything Else
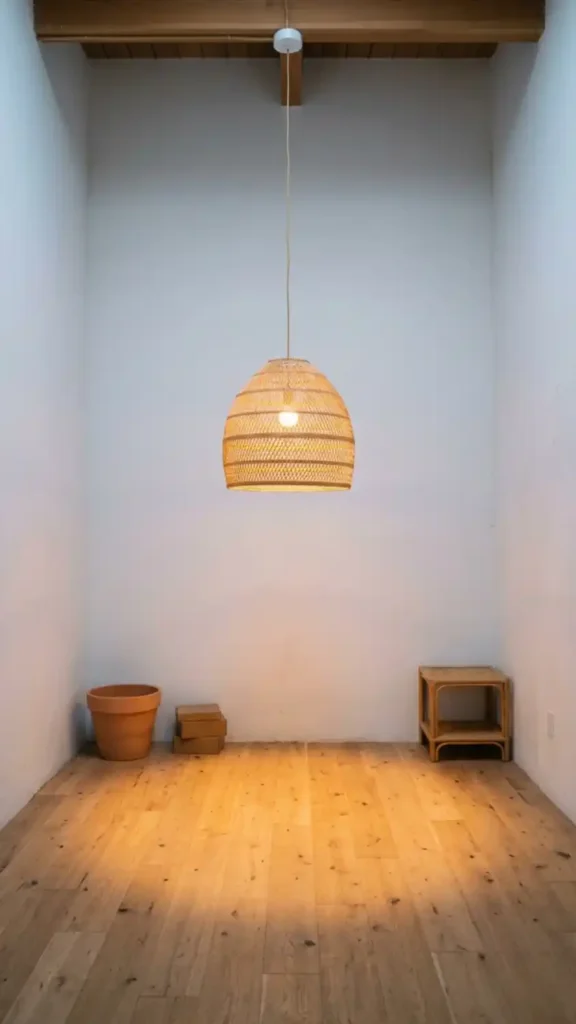
Before you buy a single object or choose a wall color, replace every bulb in the space with 2700K warm LED or incandescent equivalent.
This step comes first because lighting temperature determines how every subsequent material decision will read in the room. If you choose your wall color under cool-white overhead light and then switch to warm lighting later, the color you chose will behave differently than it did in the store or on the swatch. The same is true for textiles, ceramics, and wood finishes.
Work under the lighting you’ll actually live with from the beginning of the process. Rattan or woven fiber pendants are the correct fixture material for this aesthetic — they cast geometric shadow projections onto surrounding surfaces after dark, adding a layer of visual texture that solid shades can’t produce. Install the pendant first, set it to 2700K, and make every subsequent decision under that light.
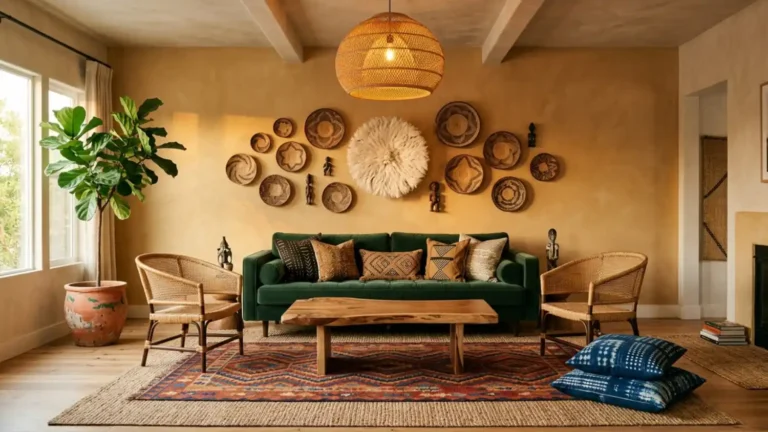
Step 2: Choose Your Anchor Textile First
The anchor textile is the single most important decision in the room — because every color, material, and pattern choice that follows will be made in response to it.
Mud cloth is the most reliable anchor because its palette is already resolved: warm black, undyed cream, and a geometric pattern tradition developed over centuries. The colorway gives you your dominant tone (warm black), your neutral (cream), and your pattern scale reference in a single object.
Buy the anchor textile before you buy the sofa, before you choose the wall color, before you select the rug. Take it home and lay it on the floor of the space under your 2700K light. Everything else gets chosen by standing over it and asking: does this material, color, and scale belong in conversation with this textile?
Step 3: Set the Wall Tone
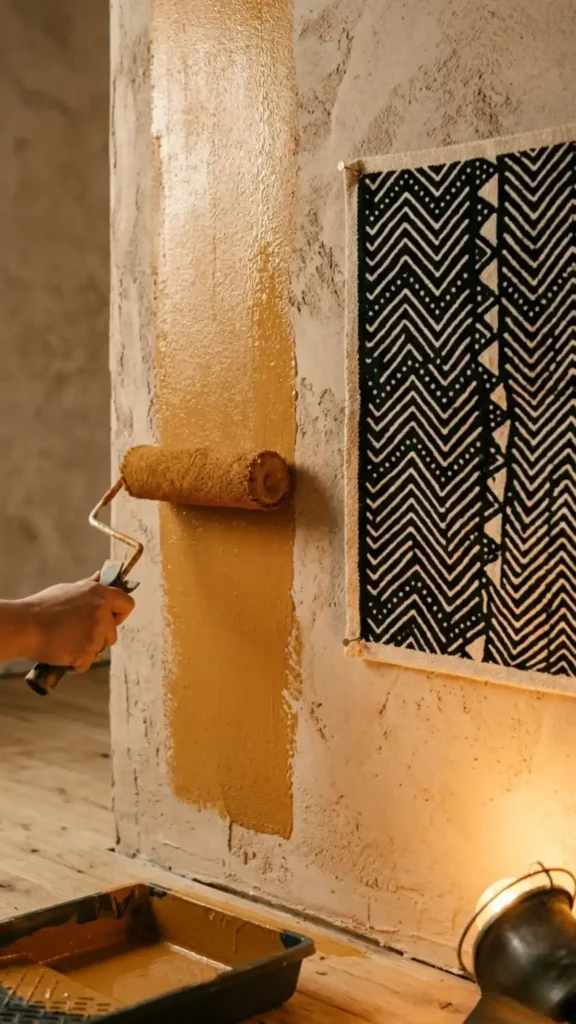
The wall tone is the room’s largest surface area and its visual foundation — which means it has to participate in the palette rather than just recede behind it.
If your anchor textile is a classic black and cream mud cloth, your wall options are: warm sand, raw ochre, or warm terracotta. All three sit within the earth pigment family and will deepen under 2700K light. Raw linen paint — an off-white with strong warm yellow undertone — works as a lighter alternative where a deeper wall would make the space feel too enclosed.
Avoid white. Avoid cool grey. Avoid anything that reads as a background rather than a participant. Sample your wall color on a large section of the actual wall — at least 60cm square — and evaluate it under your 2700K lamp at night before committing. The sample card in the store is meaningless; only the color in your actual space under your actual light tells you the truth.
Step 4: Lay the Floor Anchor
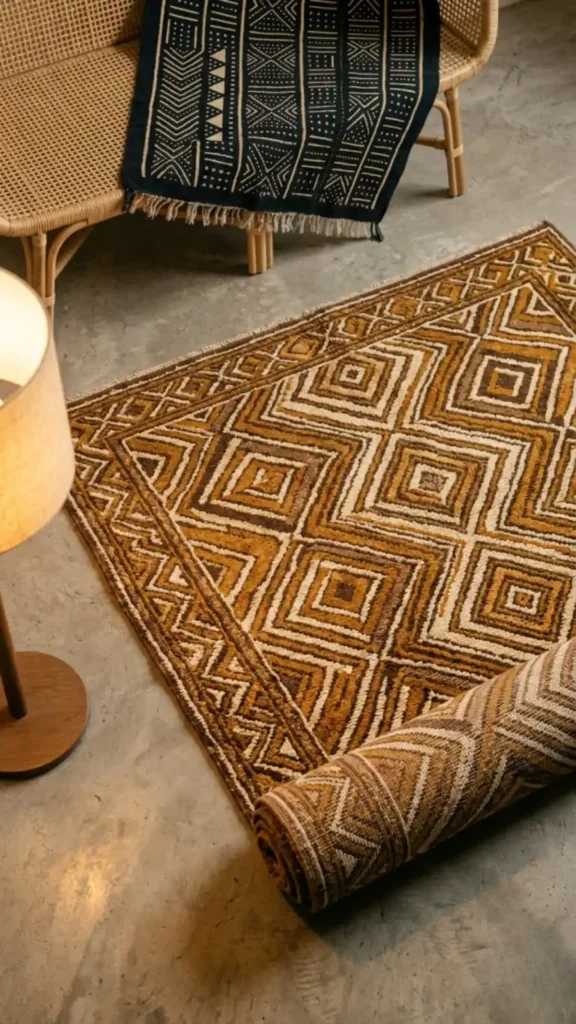
The rug defines the room’s ground plane and establishes the mid-scale pattern layer that everything above it responds to.
Choose a rug that is large enough to sit under the front legs of all major seating — a rug that floats in the center of the room without touching the furniture perimeter creates visual disconnection between the floor layer and the furniture layer. In an Afro Bohemian room, the rug, furniture, and textiles should read as a unified ground composition.
The rug pattern should be geometric and mid-scale — diamond repeat, chevron, interlocking square. The colorway should be drawn directly from your anchor textile: if your mud cloth is black and cream, the rug should pick up either the black, the cream, or the ochre accent that bridges them. The rug is not where you introduce new colors — it’s where you deepen and extend the palette already established by the anchor textile.
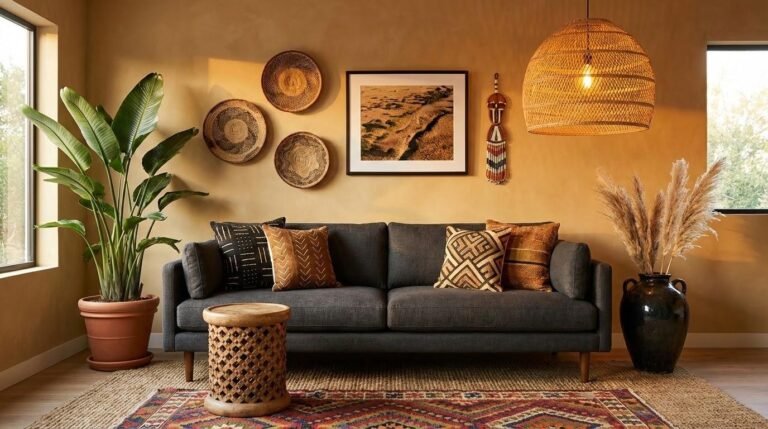
Step 5: Choose the Furniture Form
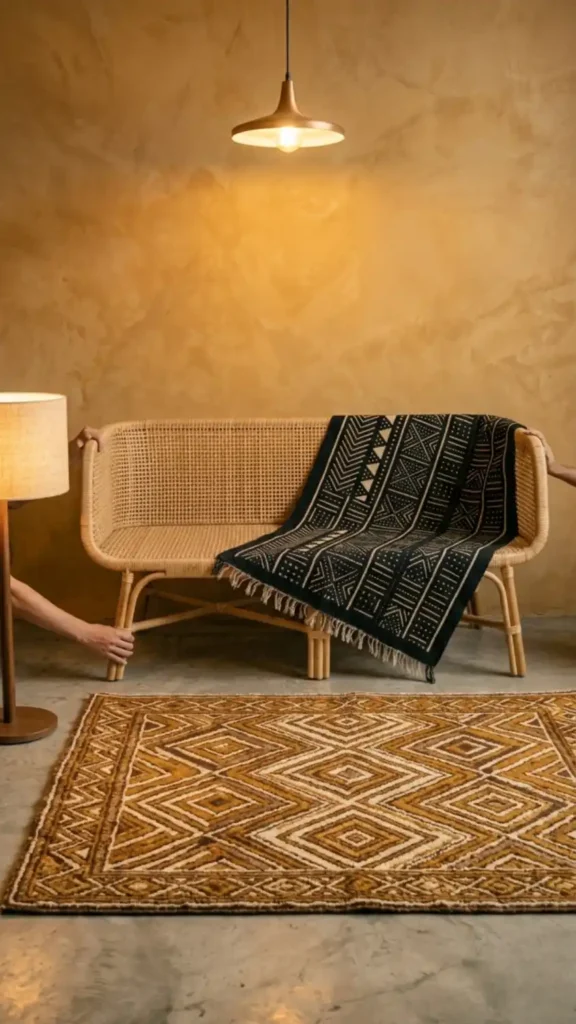
Furniture selection in Afro Bohemian design is primarily a form decision, not a color decision.
The silhouette should be low and grounded — platform beds, low-slung rattan chairs, squat wooden stools, coffee tables at ankle height. The material should be natural — dark-stained hardwood, rattan, wicker, or leather in terracotta or warm brown. The upholstery, where it exists, runs in linen or cotton in a palette tone rather than a contrasting one.
Resist the instinct to use the sofa or bed as a color statement. In Afro Bohemian design, the furniture is the structural layer and the textiles are the expressive layer. A dark wood or neutral rattan furniture frame lets the textiles read clearly in front of it. A strongly colored sofa competes with the textile layer and reduces the room’s ability to hold pattern depth.
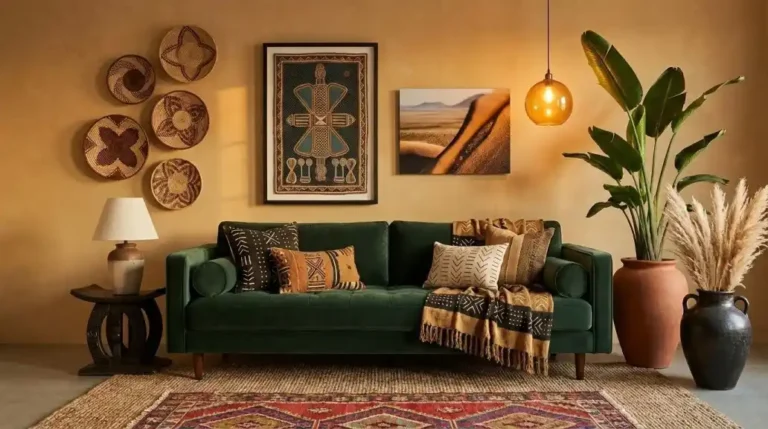
Step 6: Build the Textile Layer
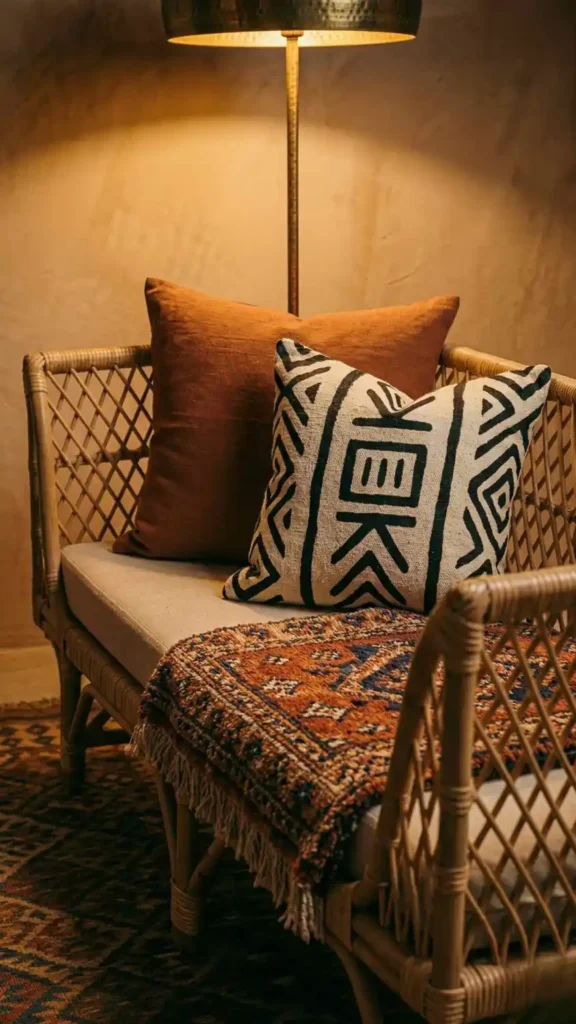
Textile layering follows a three-scale rule: large pattern at the macro level, mid-scale pattern at the mid level, small-scale pattern at the detail level.
On a sofa: the mud cloth throw is the large-scale anchor. The rug below is the mid-scale ground layer. A small kente-inspired cushion or a hand-knotted wool pillow is the small-scale detail. Each pattern occupies a distinct perceptual distance from the viewer — so the eye reads them sequentially rather than simultaneously.
Add textiles one at a time rather than styling the whole sofa in a single session. Place the first textile. Step back and evaluate whether the room needs another layer or whether what’s there is already complete. The instinct to add more is strong — resist it until the existing layer has been lived with for a few days. Over-layering is faster to do and slower to undo than under-layering.
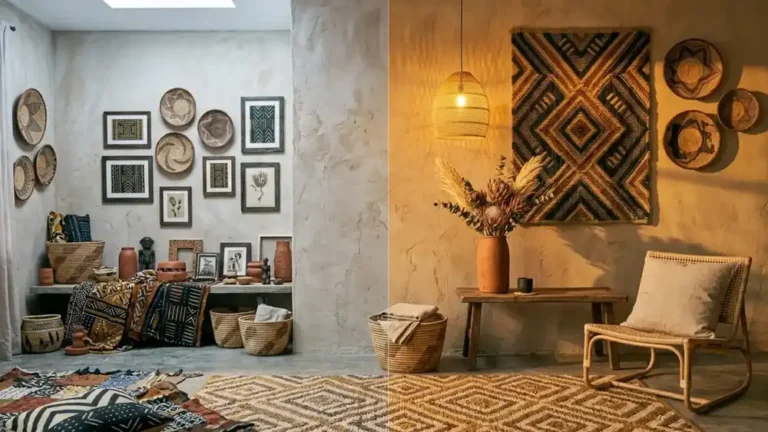
Step 7: Hang the Wall Textile
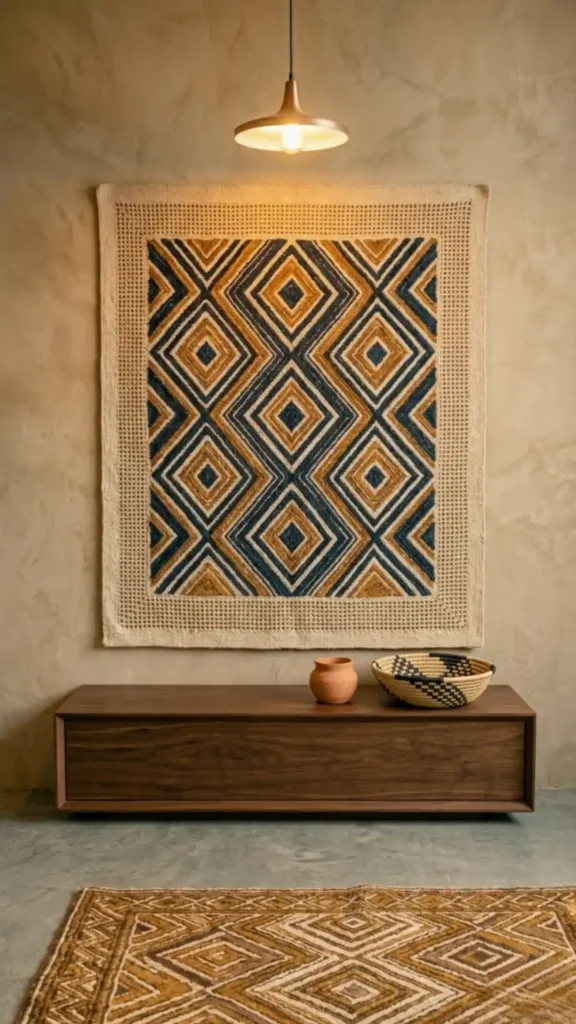
The wall textile is the room’s primary vertical element and its most architecturally significant surface decision.
Choose a tapestry that is large — at minimum 120cm wide — with geometric pattern in the earth palette. The scale matters: a small tapestry on a large wall reads as an accessory. A large tapestry on the same wall reads as architecture.
Hang it lower than standard picture-hanging height. The bottom edge should sit close enough to the furniture or console below it that the two elements read as a unified vertical composition. The gap between the bottom of the art and the top of the furniture is where most wall compositions fail — close that gap and the wall layer connects with the furniture layer instead of floating above it.
Step 8: Add the Object Layer
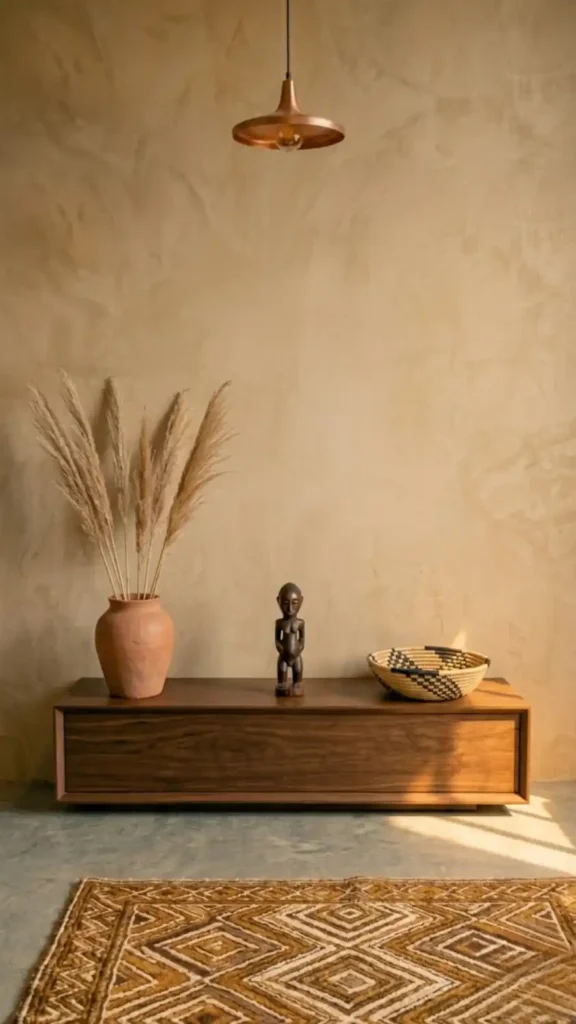
Objects are the final layer — not the starting point.
The order matters because objects placed before the textile and furniture layers are chosen in isolation rather than in response to the room’s existing visual weight. Placed last, they fill specific needs: a terracotta vessel where the palette needs grounding, a coiled basket where the room needs texture without pattern, a dark wood figurine where a vertical element is needed at small scale.
Style objects in odd numbers — three or five — varying height, material, and scale within each group. One tall vessel, one mid-height object, one low element. Leave deliberate negative space between them. The negative space within the vignette is as important as the objects themselves — it’s what separates a curated arrangement from a crowded shelf.
Step 9: Establish the Visual Rest Zone
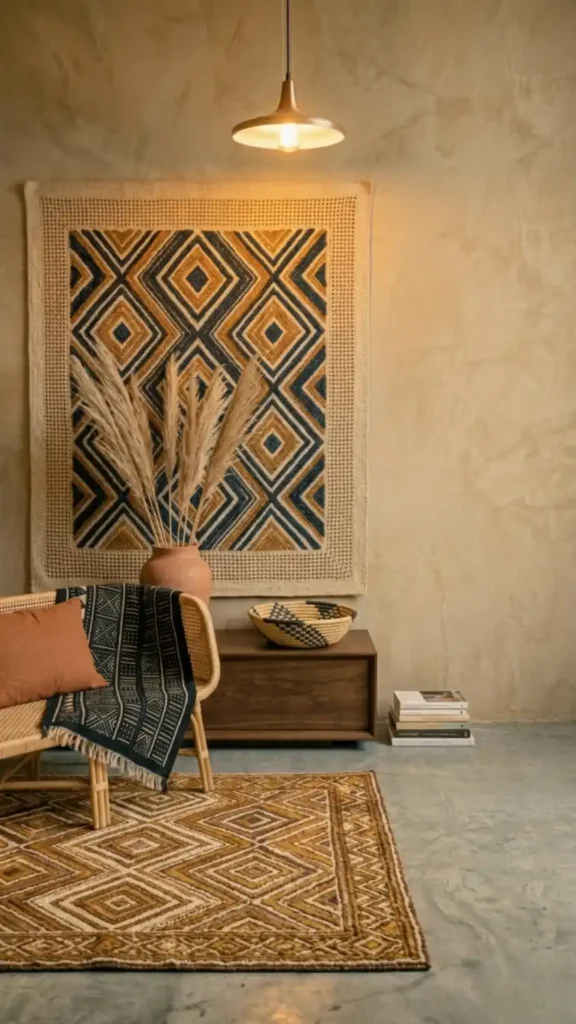
Once the room is assembled, identify the visual rest zone — the section of wall, floor, or surface that remains undecorated.
If every surface is activated, the room lacks contrast between decorated and undecorated — and contrast is what makes the textured, layered sections read as rich rather than chaotic. The bare plaster wall makes the tapestry more impactful. The empty floor section makes the rug more legible. The unstyled shelf surface makes the vignette beside it more intentional.
If the room currently has no rest zone, identify the least important decorated surface and clear it entirely. Don’t replace what you remove — leave it empty and live with it for a week. The room will almost certainly feel more resolved, not less complete.
Step 10: Add the Final Lighting Layer
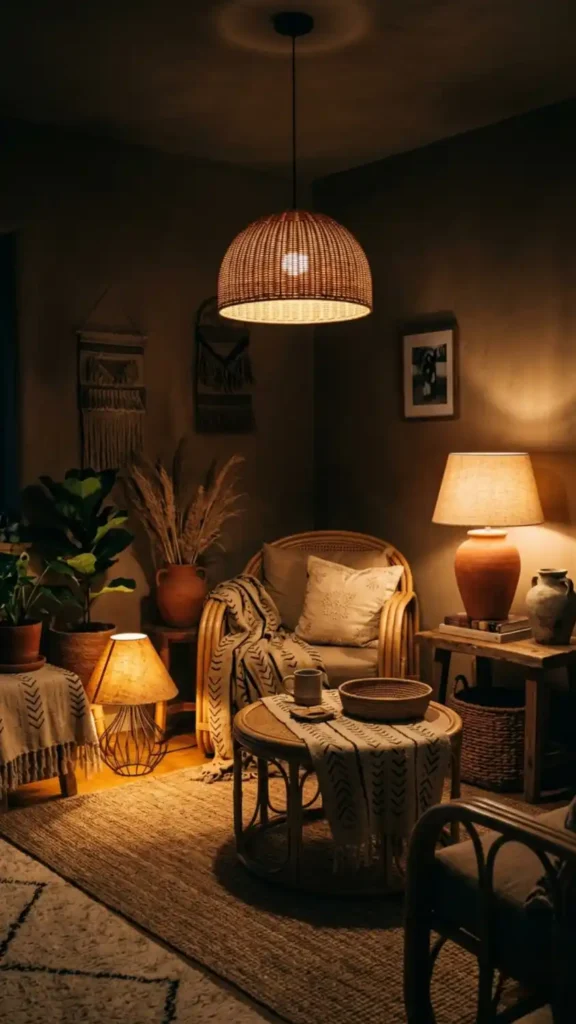
The final step is resolving the lighting architecture — and this is separate from the bulb temperature you set in step one.
Lighting architecture means distributing light sources at multiple heights: pendant or ceiling at the top, table lamp at seated eye level in the middle, floor lamp or candle source at low level. The three zones create areas of intensity and shadow — and shadow is what makes every textured surface in the room visible.
A room lit only from above is a room in which all texture reads flat. The mud cloth weave, the rug pile, the plaster wall texture, the rattan shadow projections — all of these are created by light arriving at an angle, not from directly above. Position at least one lamp so its light rakes across a textured surface rather than washing down from overhead. That single repositioning will do more for the room’s visual depth than any additional object purchase.
Tracking Your Own Progress Before You Buy the Next Layer
Once the foundational steps are complete, use these questions to evaluate what the room actually needs before adding anything further:
- Stand at the room’s entry point under 2700K evening light. Is there one zone that immediately reads as visually heavier than the rest? That’s where the rest zone needs to be introduced or expanded.
- Identify the three most visually prominent patterns. Are they at three distinct scales? If two are competing at the same scale, resolve that before adding any new textile.
- Look at the wall textile and the furniture beneath it as a single vertical composition. Is there a disconnecting gap between them? Lower the textile or raise the console height to close it.
- Run your hand across the most prominent soft furnishing. Is the surface texture variation — raised weave, pile depth, fiber irregularity — clearly felt? If not, that piece is doing less material work than it should.
- Is there at least one object in the room with visible hand-craft evidence — tool marks, slight irregularity, glaze variation? If everything is machine-smooth, the room is missing the surface character that makes the aesthetic feel genuine.
- Which area of the room are your eyes drawn to last? That’s the rest zone. If it doesn’t exist and your eyes cycle continuously with no pause, the room needs one clear undecorated section added before anything else.
Afro Bohemian design rewards patience more than budget. The room assembled slowly — one anchor textile, one wall tone, one rug, one piece of furniture, objects found over months rather than ordered in a weekend — will always read as more authentic than the room purchased all at once. The time between decisions isn’t delay. It’s the design process. Each layer you live with before adding the next one teaches you specifically what’s missing — which is more useful than any mood board ever produced.
Continue Here:
- Afro Bohemian Interior Design: The Complete Style Guide — Before starting the sequence, understand the full cultural and material logic that explains why each step in this process works the way it does.
- 15 Afro Bohemian Interior Design Ideas for a Warm and Layered Home — Each step in this guide has a corresponding visual reference here — use it to see what correct execution looks like at every stage of the build.
- 11 Afro Bohemian Color Palettes That Actually Work — Step 3 requires a wall tone decision — use these 11 palettes to identify the right earth pigment combination before you buy a single paint sample.
- 9 Common Afro Bohemian Decorating Mistakes to Avoid — Each step in this sequence has a corresponding mistake that undermines it — read this before starting so you know what to watch for at every stage.
- How to Mix Soulful Earth Tones in Afro Bohemian Decor — Steps 4, 6, and 7 all depend on getting the pattern scale hierarchy right — this guide covers that system in full detail.
- How to Decorate in Afro Bohemian Style Without Making It Look Busy — Step 9 introduces the visual rest zone — this guide builds the complete system for balancing layering and negative space across the whole room.
- Afro Bohemian Decor Must-Haves for Beginners — If Steps 1 through 3 feel overwhelming as a starting point, this beginner list narrows the first decisions down to the absolute non-negotiables.